Redis is an in-memory data store. For WordPress, it acts as a persistent cache for database query results, WordPress options, and transient data — anything that would otherwise require a database round-trip on each request.
What Redis Actually Caches
Without Redis, WordPress queries the database on every request for:
- Site options (
wp_optionstable — loaded on every page) - User sessions and metadata
- Plugin transients (temporary stored data)
- Post metadata
- Nav menu structures
With Redis object cache, these are stored in RAM after the first query. Subsequent requests retrieve them from Redis in microseconds instead of running SQL queries.
The impact is most visible on sites with many active plugins — each plugin typically adds to the options table and creates transients. Redis effectively eliminates most of that database load after the first warm-up request.
Step 1 — Install Redis
sudo dnf install redis -yStep 2 — Verify Redis is Bound to Localhost Only
Before starting Redis, confirm the config is correct:
grep "^bind" /etc/redis/redis.confShould show:
bind 127.0.0.1 -::1This means Redis only accepts connections from localhost. If it shows 0.0.0.0, Redis would be accessible from the internet — a serious security issue. Edit the config if needed:
sudo nano /etc/redis/redis.conf
# Find the bind line and ensure it reads:
# bind 127.0.0.1 -::1
Step 3 — Enable and Start Redis
sudo systemctl enable --now redisVerify it’s running and listening on localhost only:
sudo systemctl status redis
sudo ss -tlnp | grep redis
# Should show: 127.0.0.1:6379
Test the connection:
redis-cli ping
# Should return: PONG
Step 4 — Add Redis Constants to wp-config.php
If you added these in Part 5.2, they’re already there. If not, add them now:
sudo nano /var/www/yourdomain.com/wp-config.phpAdd before the /* That's all, stop editing! */ line:
define( 'WP_REDIS_HOST', '127.0.0.1' );
define( 'WP_REDIS_PORT', 6379 );
define( 'WP_REDIS_TIMEOUT', 1 );
define( 'WP_REDIS_READ_TIMEOUT', 1 );
define( 'WP_REDIS_DATABASE', 0 );
Step 5 — Install the Redis Object Cache Plugin
In WordPress admin: Plugins → Add New → search “Redis Object Cache” → Install → Activate.
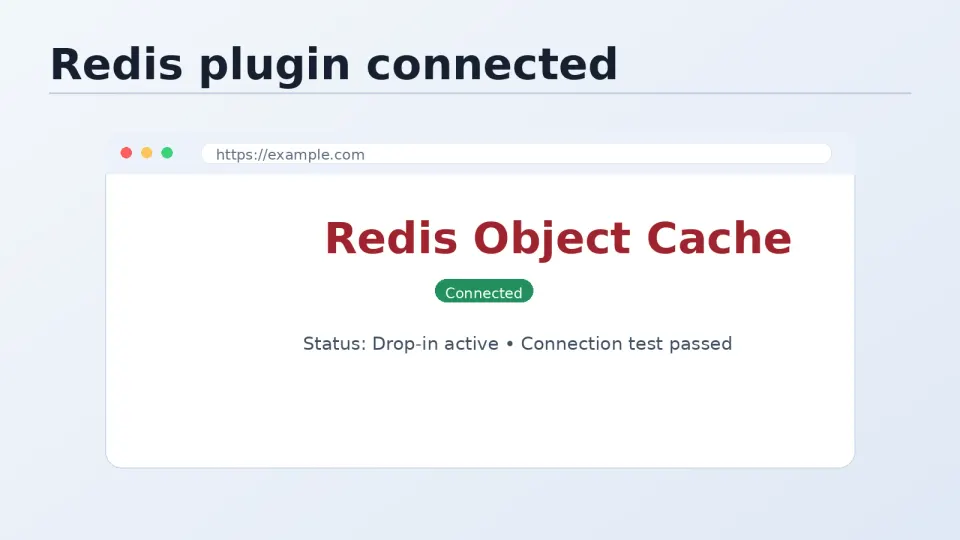
Navigate to Settings → Redis. Click Enable Object Cache.
The status should change to Connected.
Step 6 — Verify It’s Working
From the terminal, watch Redis activity in real time:
redis-cli monitorLoad a few pages on your WordPress site. You should see GET and SET commands appearing in the monitor output — Redis is receiving and serving cache requests.
Press Ctrl+C to exit monitor mode.
Check memory usage:
redis-cli info memory | grep used_memory_humanOn a fresh WordPress install, Redis typically uses 5–20MB. On a busier site with more data, it grows — but stays well within the RAM you’ve allocated.
A Note on Redis and Multiple Sites
If you’re running multiple WordPress sites on the same VPS, each site should use a separate Redis database to avoid key collisions:
// Site 1 — uses database 0 (default)
define( 'WP_REDIS_DATABASE', 0 );

// Site 2 — uses database 1
define( 'WP_REDIS_DATABASE', 1 );

// Site 3
define( 'WP_REDIS_DATABASE', 2 );
Redis supports 16 databases (0–15) by default. Each is isolated from the others.