In WordPress, adding images is almost thoughtless. Upload to Media Library, select the image, add alt text, insert. The theme handles the rest — featured images, sizes, cropping, all defined by theme settings.
Astro is different. Not harder — but more deliberate.
You decide where images live. You decide how they’re displayed. You decide what gets optimized and how. That’s more work upfront and significantly more control long-term.
Where to put images
Astro projects have two places for images:
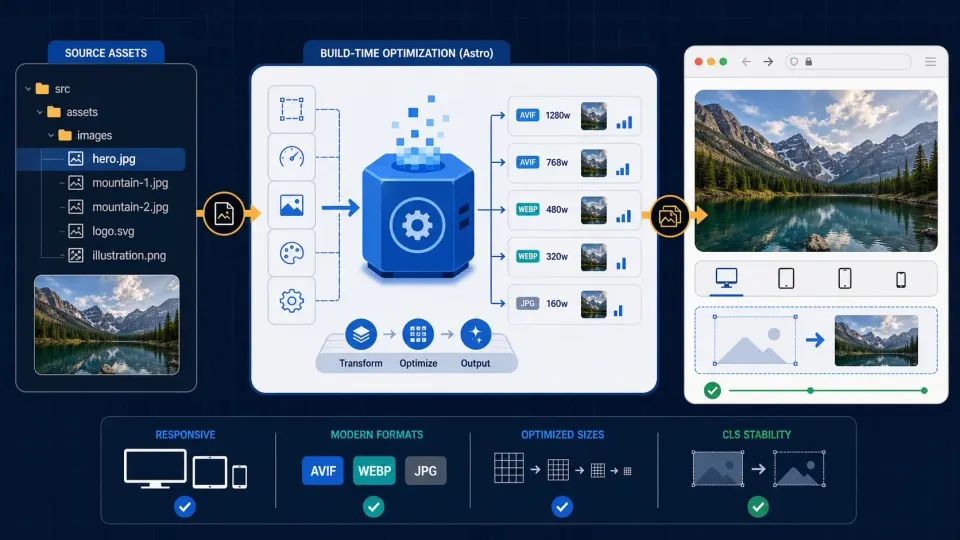
src/assets/images/ — for images you want Astro to optimize at build time. Astro converts them to WebP, generates correct dimensions, enables lazy loading. This is where content images belong.
public/ — for images served as-is, no processing. Favicons, open graph images, files that need a stable URL. Astro copies these directly to the output folder without touching them.
For blog posts, reviews, guides — use src/assets/images/.
Create the folder structure once and stick to it:
mkdir -p src/assets/images/posts
mkdir -p src/assets/images/reviews
mkdir -p src/assets/images/compares
mkdir -p src/assets/images/guides
Method 1: Markdown image syntax
The simplest way to add an image to a post is standard Markdown syntax:
The ![]() syntax works in both .md and .mdx files. Astro processes it through the image optimizer automatically — no extra import, no component needed.
The path is relative to the content file. From src/content/posts/, going up two levels (../../) reaches src/, then down to assets/images/posts/.
Method 2: Astro Image component in MDX
For .mdx files, you can import and use Astro’s <Image /> component directly:
import { Image } from 'astro:assets'
import myImage from '../../assets/images/posts/what-is-mdx.jpg'

<Image
  src={myImage}
  alt="MDX components render inline with content"
  width={800}
  height={420}
/>
This gives you explicit control over dimensions, which matters when you need a specific aspect ratio or want to prevent layout shift during load.
When to use which:
Markdown ![]() | Astro <Image /> | |
|---|---|---|
Works in .md files | ✅ | ❌ |
Works in .mdx files | ✅ | ✅ |
| Import required | No | Yes |
| Explicit dimensions | No | Yes |
| Auto-optimization | Yes | Yes |
| Best for | Quick inline images | Precise layout control |
For most inline content images, Markdown syntax is the right choice. Reach for <Image /> when you need exact dimensions or are already using MDX components in that file.
Hero images via frontmatter
For content types where every entry has a header image — blog posts, reviews, guides — the right approach is a heroImage field in the frontmatter rather than the first line of the content.
This separates the metadata from the body. The template decides where and how the hero image displays. The content file just declares what the image is.
Step 1: Update the schema
In src/content.config.ts, use image() instead of z.string() for the hero image field:
const posts = defineCollection({
  loader: glob({ pattern: '**/*.{md,mdx}', base: './src/content/posts' }),
  schema: ({ image }) => z.object({
    title: z.string(),
    description: z.string(),
    publishedAt: z.date(),
    heroImage: image().optional(),
    heroImageAlt: z.string().optional(),
  }),
})
Note schema: ({ image }) => — the schema is now a function that receives the image helper. This is Astro-specific syntax that enables build-time image validation and optimization metadata.
Step 2: Add heroImage to frontmatter
---
title: Hello World
description: Every developer starts here. So do I.
publishedAt: 2026-06-17T00:00:00Z
heroImage: ../../assets/images/posts/hello-world.jpg
heroImageAlt: A bench against a wall — the simplest things say the most
---
Step 3: Display in the template
---
import { Image } from 'astro:assets'
---

{post.data.heroImage && (
  <div class="hero-image">
    <Image
      src={post.data.heroImage}
      alt={post.data.heroImageAlt || post.data.title}
      width={1200}
      height={630}
    />
  </div>
)}
Why image() instead of z.string()
This confused me at first. Both seem to store an image path — why is image() different from z.string()?
z.string() just validates that the value is a string. It doesn’t care what the string says.
image() does three things z.string() can’t:
- Validates the file exists — if the image path is wrong, Astro throws a build error immediately instead of serving a broken image
- Reads image dimensions — Astro knows the width and height at build time, which prevents layout shift when the image loads
- Enables optimization — the image gets processed through Astro’s pipeline: converted to WebP, compressed, properly sized
One field declaration. Build-time validation, dimensions, and optimization — all included.
The listing page thumbnail
Hero images shouldn’t only appear on detail pages. Listing pages — /blog, /reviews — benefit from thumbnails that help readers scan and decide what to click.
In the listing page template, display a smaller version of the same hero image:
{post.data.heroImage && (
  <div class="post-thumbnail">
    <Image
      src={post.data.heroImage}
      alt={post.data.heroImageAlt || post.data.title}
      width={400}
      height={210}
    />
  </div>
)}
Same field, different dimensions. Astro generates an appropriately sized version for each use.
The repo size problem
Here’s something WordPress developers don’t think about: in Astro, images are files in your Git repository.
Every image you add to src/assets/images/ gets committed to Git. The repository grows. Cloning gets slower. Build times increase.
For a personal blog with 50 posts — totally fine. Each image is maybe 100-200KB. That’s 5-10MB total. No problem.
For a content site with 500 posts, product reviews with multiple images each, comparison tables with screenshots — you’re looking at hundreds of megabytes in the repo. That becomes a real problem.
The solution is an external image CDN. Store images outside the repo, reference them by URL. The repo stays lean regardless of how much content you have.
That’s exactly what the next article covers — Cloudinary, how it works, and when to make the switch from local images.