Two A records. Five minutes. Green padlock. That’s the whole process when everything is set up correctly.
What You Need Before Starting
- Your VPS IP address — find it in the Vultr dashboard
- Access to your domain registrar’s DNS management panel
Step 1 — Create the A Records
Log into your registrar (Namecheap, GoDaddy, or wherever your domain lives) and navigate to DNS management for your domain.
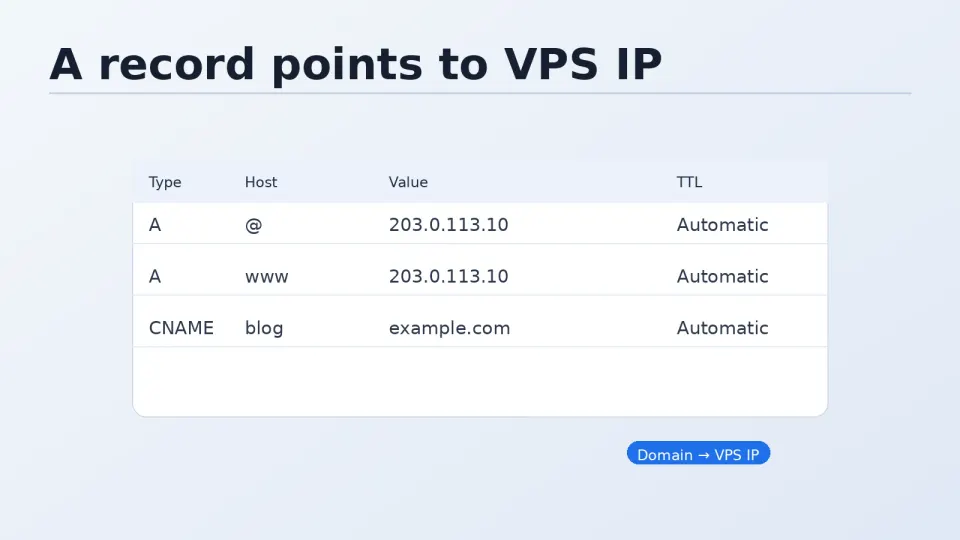
Create two A records:
| Type | Host | Value | TTL |
|---|---|---|---|
| A | @ | Your VPS IP | 300 |
| A | www | Your VPS IP | 300 |
@ is shorthand for the root domain — yourdomain.com. The www record handles www.yourdomain.com.
TTL 300 = 5 minutes. This is the lowest most registrars allow. Lower TTL means faster propagation when you change records. If your registrar defaults to something higher (3600 or 86400), change it to 300 before saving.
Step 2 — Check Propagation from Your Terminal
From your local machine (not the server):
ping yourdomain.comWhen the IP in the ping output matches your VPS IP, DNS has propagated to your location. Takes anywhere from under a minute to a few hours depending on your registrar and your local DNS resolver’s cache.
The faster check — bypass your local cache entirely and query a public DNS server directly:
# Query Google's DNS directly
dig yourdomain.com @8.8.8.8 +short

# Query Cloudflare's DNS
dig yourdomain.com @1.1.1.1 +short
Both should return your VPS IP once the record has propagated to those servers.
For a global view — check multiple locations at once:
https://whatsmydns.netEnter your domain, select A record, and see propagation status across different regions. Useful when the site works from your location but someone in another country reports it’s not loading.
Step 3 — Once DNS Resolves, Run Certbot
The workflow that works reliably:
# From terminal, confirm domain resolves to VPS IP
ping yourdomain.com
# Verify the IP matches your Vultr server

# Then request the SSL certificate
sudo certbot --nginx -d yourdomain.com -d www.yourdomain.com
Certbot’s HTTP challenge requires the domain to resolve to your server. Running it before DNS has propagated gives an error like:
Challenge failed for domain yourdomain.comConfirm the domain resolves first, then run certbot.
About Cloudflare DNS
You may have heard that Cloudflare DNS is faster and more reliable than registrar DNS. This is accurate — Cloudflare operates one of the largest DNS networks globally, and their 1.1.1.1 resolver is consistently faster than most registrar nameservers.
The setup: add your domain to Cloudflare’s free tier, get two Cloudflare nameservers, update the nameservers at your registrar to point to Cloudflare. From then on, you manage DNS through the Cloudflare dashboard instead of your registrar.
Additional benefits with Cloudflare:
- DDoS protection at the network level
- Option to proxy traffic (hides your server IP)
- Analytics on DNS queries
- Very fast propagation — record changes often live in under a minute
It takes about 10 minutes to set up. Worth doing when you have time, but not required for WordPress to work. Registrar DNS with A records pointing to your VPS IP is sufficient.
Common Issues
Ping still resolves to old IP after 30+ minutes:
Your local DNS resolver is caching the old record. Try from a different network or use dig @8.8.8.8 to bypass local cache.
Certbot fails with “could not verify domain”: DNS hasn’t propagated to Let’s Encrypt’s servers yet. Wait a few more minutes and try again.
Site loads but shows wrong content: Another server is still responding for that domain — check that you don’t have an old A record pointing elsewhere.
www works but root domain doesn’t (or vice versa): One of the two A records is missing or pointing to the wrong IP. Check both records in your DNS panel.