For the first decade of my web development work, “deploying a site” meant one of these:
- Uploading files via FTP to shared hosting
- SSH into a VPS, pull the latest Git changes, restart Nginx
- Clicking through a hosting control panel, uploading a zip file
All of those work. All of them have friction. FTP is slow. SSH requires you to manage the server. Control panels are clunky.
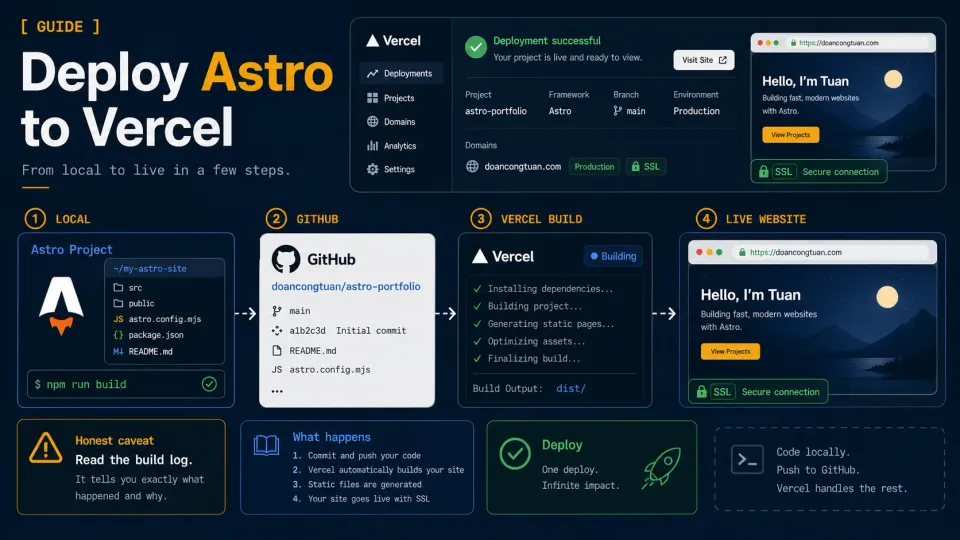
Vercel is none of those things.
Connect your GitHub repo. Click Deploy. Your site is live. From that point, every git push triggers a new deploy automatically. You never touch the deployment process again unless something breaks.
It took me an embarrassingly long time to trust that it was actually this simple. This article is for anyone else who’s skeptical.
Before you start
You need:
- An Astro project pushed to a public GitHub repo
- A free Vercel account, sign up at vercel.com
If you haven’t pushed to GitHub yet, go back to Article 2: Setting Up Your First Astro Project and complete that step first.
Step 1: Create a Vercel account
Go to vercel.com and click Sign Up.
Choose Continue with GitHub. This is important: signing up with GitHub lets Vercel access your repositories directly. You won’t need to configure credentials or SSH keys.
Follow the prompts. Vercel will ask for your GitHub authorization to access your repos.
When asked about your plan, choose the free/Hobby option if it is available. It is enough for this demo project and most small learning projects. For a serious production site, check Vercel’s current limits before relying on it.
Step 2: Import your GitHub repo
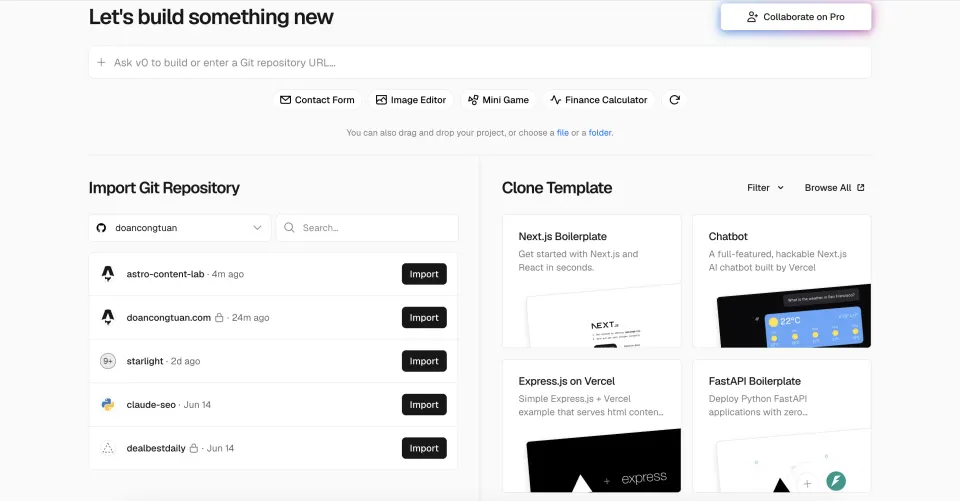
From the Vercel dashboard, click Add New Project.
Vercel shows your GitHub repositories. Find astro-content-lab and click Import.
Step 3: Configure the project
This is where Vercel feels much easier than a manual server deploy.
It detects that you’re using Astro automatically. The configuration page shows:
- Framework Preset: Astro
- Build Command:
astro build - Output Directory:
dist - Install Command:
npm install
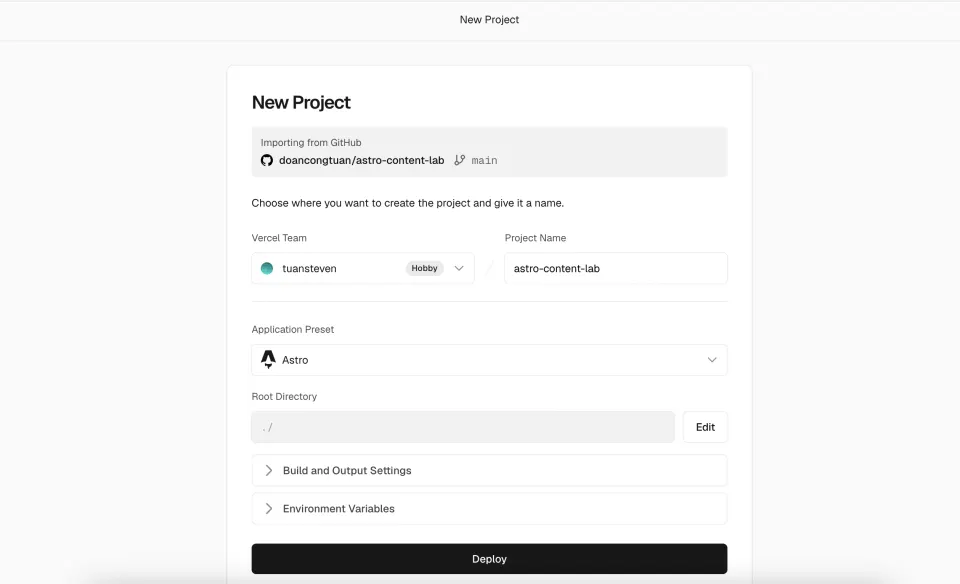
For this project, do not change any of these. Vercel’s Astro defaults are the right starting point.
If your project uses environment variables, like API keys or Supabase URLs, add them here under Environment Variables. The .env file on your local machine is not uploaded to GitHub (it’s in .gitignore), so Vercel needs them explicitly.
For this demo project, there are no environment variables. Leave everything as-is.
Step 4: Deploy
Click Deploy.
Vercel starts the build:
- Pulls your code from GitHub
- Runs
npm install - Runs
astro build - Uploads the
dist/folder to their CDN
The first build takes 1-2 minutes. You can watch the live build log:
[18:32:01] Running "npm install"...
[18:32:15] Running "astro build"...
[18:32:16] ▶ src/pages/index.astro
[18:32:16] ▶ src/pages/blog.astro
[18:32:16] ▶ src/pages/blog/hello-world
[18:32:16] ▶ src/pages/reviews/hostinger-review
...
[18:32:18] ✓ Built in 2.1s
[18:32:20] Deployment complete.
When it finishes, Vercel gives you a live URL:
https://astro-content-lab.vercel.app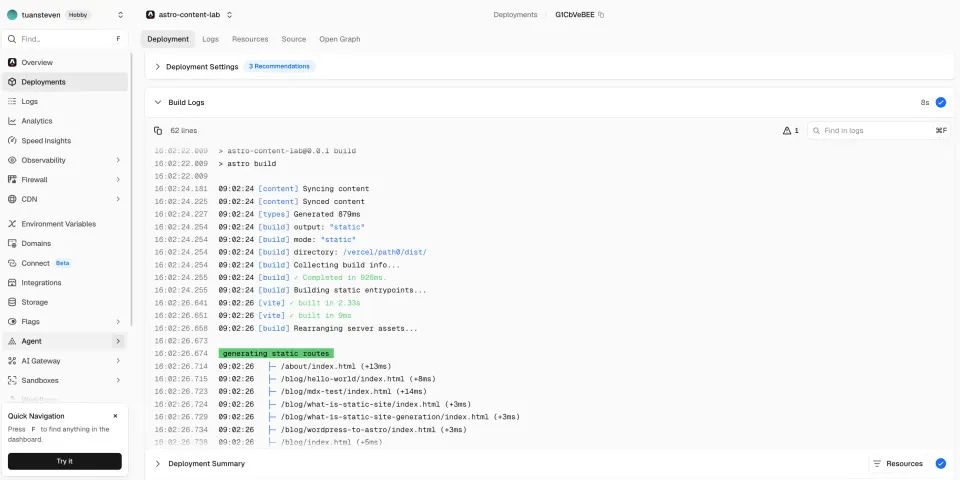
Open the URL. Your site is live, served from Vercel’s global CDN.
You can compare both deployed versions used in this series:
How auto-deploy works from now on
Every time you push to the main branch on GitHub, Vercel builds and deploys automatically.
The workflow becomes:
# Make changes to your site
# Edit content, fix a bug, add a page

git add .
git commit -m "add new blog post"
git push

# Vercel detects the push
# Runs npm install + astro build
# Deploys to CDN
# New version live in ~60 seconds
No additional steps. No manual deployment. Push code, site updates.
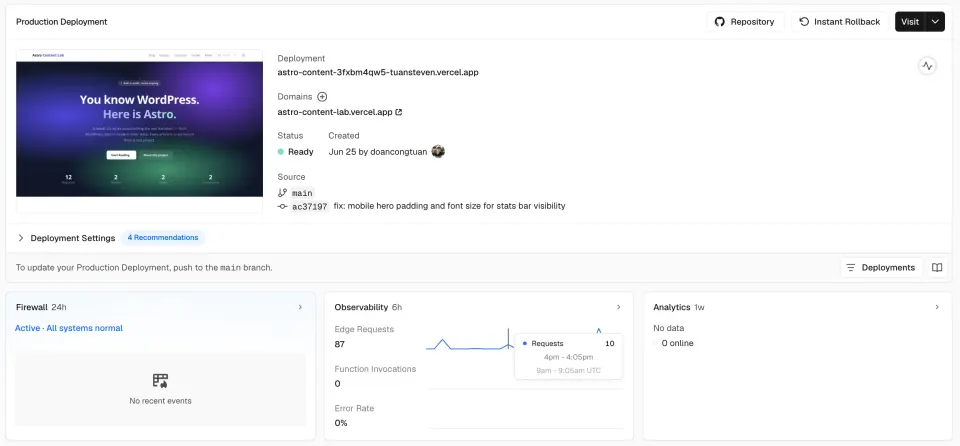
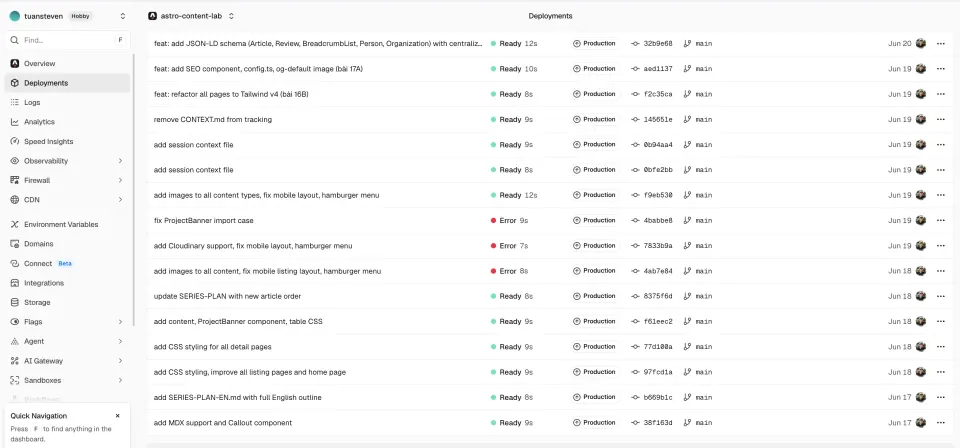
You can see every deployment in the Vercel dashboard: timestamp, commit message, build status, and a link to that specific deployed version.
Preview deployments for other branches
When you push to any branch other than main, Vercel creates a preview deployment, a separate live URL for that branch.
git checkout -b add-new-feature
# make changes
git push origin add-new-feature
Vercel builds the branch and gives you a URL like:
https://astro-content-lab-git-add-new-feature-tuansteven.vercel.appThis is useful for reviewing changes before merging. Share the preview URL with a collaborator, check how it looks on mobile, test something on a live URL without touching the main site.
For a solo developer, it’s less critical. But it’s there when you need it.
Adding a custom domain
The vercel.app URL works for development and testing. For a production site, you want your own domain.
In Vercel:
- Open your project in the Vercel dashboard
- Go to Settings → Domains
- Type your domain:
yourdomain.com - Click Add
Vercel shows you two DNS records to add:
Type: A
Name: @
Value: 76.76.21.21

Type: CNAME
Name: www
Value: cname.vercel-dns.com
At your domain registrar (Namecheap, GoDaddy, wherever you bought the domain):
- Find the DNS management section
- Add the A record and CNAME record exactly as Vercel showed you
DNS propagation takes anywhere from a few minutes to 48 hours, depending on your registrar and TTL settings. Most registrars update in under an hour.
Once propagated, Vercel provisions an SSL certificate automatically. No Certbot. No certificate renewal reminders. It just works.
When the build fails
Builds fail. It happens. Here’s how to debug it.
Check the build log:
In the Vercel dashboard, click on the failed deployment. The full build log is there. Look for red error lines.
Common causes and fixes:
Invalid frontmatter in a content file:
Error: Invalid content entry data in "posts/my-post.md"Open the file. Check your frontmatter for typos, wrong data types, missing required fields.
Missing environment variable:
Error: Cannot read properties of undefined (reading 'url')A variable you’re using in the code doesn’t exist in the Vercel environment. Add it in Settings → Environment Variables.
TypeScript error:
Error: Type 'string' is not assignable to type 'number'A type mismatch in your code. Fix it locally: run npm run build on your machine first to catch these before pushing.
Build command fails:
sh: astro: command not foundUsually a dependency issue. Check that @astrojs/... packages are in package.json and not just in node_modules.
The most reliable debugging workflow: Run npm run build locally before pushing. It catches most problems before Vercel sees them. It will not catch every environment difference, especially case-sensitive file paths, but it removes a lot of avoidable surprises.
“Could not resolve”: case-sensitive import paths
This one is sneaky. Mac doesn’t care about uppercase vs lowercase in file paths. Linux does, and Vercel runs on Linux.
Write ../../Components/ProjectBanner.astro instead of ../../components/ProjectBanner.astro and it works perfectly on Mac, then breaks the Vercel build immediately.

Fix: press Cmd + Shift + F in VS Code, search Components/ with a capital C. It highlights every wrong import instantly.
I hit this twice in the same session, first in guides/[slug].astro, then blog/[slug].astro. Both had the capital C. Both passed locally. Both failed on Vercel.
One search would have caught both in 10 seconds. Run npm run build locally before every push, then still read the Vercel build log carefully when a deployment fails.
Comparing deployment options
Vercel isn’t the only option. Here’s an honest comparison:
| Platform | Free tier | Astro support | Best for |
|---|---|---|---|
| Vercel | Yes | Excellent, auto-detect | Content sites, SSR |
| Netlify | Yes | Excellent | Content sites |
| Cloudflare Pages | Yes | Good | Global edge, high traffic |
| GitHub Pages | Yes | Manual setup required | Simple static sites |
| Fly.io | Limited free | Good for SSR | Full server control |
| VPS (Vultr) | No | Manual setup | Multiple projects, SSR |
For this series, and for most personal demo projects, Vercel’s free tier is enough to learn the workflow. The auto-detection of Astro and the low-configuration deployment experience makes it the right default choice for this tutorial.
If you’re already running a VPS and want to self-host, that’s covered in a later article on Astro SSR deployment.
What you have now
After this article:
- Your Astro site is live on a public URL
- Every
git pushto main triggers an automatic rebuild and deploy - SSL is handled automatically
- Preview deployments exist for every branch
This is the full development → deploy workflow for a static Astro site:
Write content or code locally
→ npm run build (test locally)
→ git add . && git commit -m "message"
→ git push
→ Vercel builds and deploys (60 seconds)
→ Site updated
The rest of this series builds on this foundation, adding content types, styling, images, SEO, and eventually a CMS layer and backend. Every change goes through this same simple workflow.